
Sharing my notes on zipper (Tutorial?)
Nak buat tutorial, tapi terasa masih kurang berkelayakan lagi, tapi nak jugak sharing my notes in making a bag with zipper closure.
To a beginner (like me)... hopefully you can learn something from my notes. This is not a comprehensive one, u need to experience it yourself, then you know how it works
The those experts (ops.. rarely people claimed that they are an expert kan...) ok ok, I rephrase.. to those who are familiar with attaching zipper to bag, please.. please... leave a comment if anything that can improvised my notes here. I really appreciate that.
Reminder : This is not a bag tutorial, therefore no exact measure of the bag given.
What u need are:
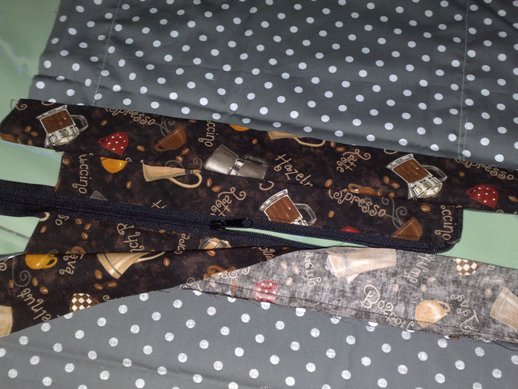
- the zipper attached to the fabric. You can refer to the tutorial from Creative Cutie here. Beg saya ni lebar 4 inci, jadinya fabric attached to zipper tuh 4 inci jugak lah (2 inch+2 inch), panjang untuk kain plak bergantung pada lebar beg, contohnya 4 inci, so panjang bag minus 4 inci lah. (ada faham tak eks...ayat yang sungguh berbelit2.. so sorry)
- The bag body (normally 2 pieces, but mine was 1 piece, folded)
- The upper lining, 2 pieces - fabric is the same as the body - The size of the upper lining depends on how deep in your zipper. Mine was 2.5 inch inclusive of the seam allowance
- The lower lining - you fabric of choice, the size was actually the length of the body minus the upper lining and dont forget the seam allowances

Mark the centre of the upper lining, lower lining and the zipper. Pin it together and sew it.

The outcome will be something like this

Then attached the other side of the lining. Repeat the same process
Then you will get the lining of the bag, attached together with the zipper in the middle
Then sew the lining and the body together - Reminder : you need to attach the strap first before this step

You will get something like this, and sew the bag as in the picture

Terbalik kan bag, and top stitch keliling bag untuk lebih kemas

Tadaaa.. dah jadi pon..

Inilah dia hasil usaha buat notes hari ni.. horey horey.. another bag in black. cantik tak? Zoom skit kat bag bottom tuh... dah berjaya buat triangle yang kemas sekali.. opsss angkat bakul sudah. Beg ini berukuran 12x11x4 inch. Muatlah nak isi telekung kee.. buku2 sekolah or apa2 ajelah.

copy paste dari http://blogrimbun.blogspot.my

No comments:
Post a Comment